Wednesday, February 23, 2011

March Class: Mens and Boys Ties


Just in time for Easter, you can make matching or coordinating ties for the men in your life.  This project requires a lot of cutting, so we will be doing this together in class.  The only thing you will need to do to prepare BEFORE CLASS is print out the pieces, tape them together, and cut out the interfacing.  {SEE DETAILS BELOW}.  This is also mainly hand sewn, so our machines will take a big break for most of the night.

Make sure to PRINT out the pattern pieces from The Purl Bee , cut, and tape them together.  Here are the links for either the MENS or BOYS ties.
The BOYS' tie is 46" and the MENS is 54" so you can reduce the size of the pattern pieces or enlarge them if you need to.   You can do that when you print out the pattern pieces by selecting it in your print options or later on a copier.

NOTE ON FABRIC SELECTION: Because ties are cut on the bias (or on a 45 ̊ angle), you need to pay special attention as you’re choosing fabrics. Tilt your head or the bolt of fabric 45 ̊ as you’re looking to know how it will look on the tie.

MATERIALS:

BOYS

  • 3/4-yard Fabric for Tie {suggested fabric: designer cottons, home dec sateen cottons, lightweight suiting}
  • 1/4-yard Fabric for Lining {suggested fabrics: lightweight cotton (such as Kona cotton), muslin, apparel lining}
  • 1/4-yard Sew in Stabilizer/Interfacing
  • 1 spool of thread in a color that compliments your fabric
  • 4 inch piece of ribbon for back of tie
  • Hand sewing needle 
  • Rotary cutter, board, and yard stick (optional but SUPER helpful)
  • Your basic sewing supplies
    Machine
    Machine manual
    Scissors
    Tape measure
    Straight pins
    Seam ripper
    Iron - A MUST
    Ironing board (we need at least 1 per 2 people)


MENS
  • 3/4-yard Fabric for Tie {suggested fabric: designer cottons, home dec sateen cottons, lightweight suiting}
  • 1/4-yard Fabric for Lining {suggested fabrics: lightweight cotton (such as Kona cotton), muslin, apparel lining}
  • 1 1/2-yards Heavyweight Sew-in Interfacing**
  • 1 yard light weight fusible interfacing**
  • ** pattern says "If you're planning on making more than two there is no need to get more interfacing- the amount of interfacing should suffice for at least four ties."
  • 1 spool of thread in a color that compliments your fabric
  • 5 inch piece of ribbon for back of tie
  • Hand sewing needle 
  • Rotary cutter, board, and yard stick (optional but SUPER helpful)
  • Your basic sewing supplies
    Machine
    Machine manual
    Scissors
    Tape measure
    Straight pins
    Seam ripper
    Iron - A MUST
    Ironing board (we need at least 1 per 2 people)


Please RSVP to let me know if you will be attending.  And as always, please feel free to ask me any questions.  See you on March 8th!!!

March Class: All Those Needed Girlie Accessories

I am so happy to have my little sis as our guest instructor this month, Vanessa Ferguson.  Anyone that knows Vanessa and/or her darling little girl Savvy, knows that they are always properly accessorized!!  Ferguliciously accessorized:-)  She will be coming to teach 3 mini-classes on making YoYos, Burnt Flower Clips, and Toddler Bracelets.  These 3 classes are easily transferable to home decor, baby, toddler, young girl, mom, or any woman of any age really! 

Listed below are the supplies for each mini-class.  A lot of these are things you have lying around the house, maybe saved in a drawer, or shoved in a basket.  These take up very little fabric so maybe cut up that old pillow case, blanket, dress, etc you've been saving for just the right project.


YoYos
Flowers by Melsharay
      
Necklace from Cookoorikoo
Tshirt by inretrospect
Fabric yo-yos are fun and super easy to make! A highly portable project, you can make yo-yos in various sizes to embellish a favorite t-shirt, a purse or a ponytail elastic. 
Here is what you need to make these puppies:
-Fabric: Now is a good time to use up all those scraps you’ve been hoarding. Medium and lightweight fabrics are ideal, as they are easier to pull down into tight yoyos.
-Thread: You can use Quilting thread, embroidery floss or Just double up your regular old sewing thread.
-A hand sewing needle
-You will need something to trace around to make your circles. (Keep in mind that your finished yoyos will end up being a little less than half the diameter of the cut circles).  My sister suggests starting with a 5" circle then going smaller and larger from there depending on what size you like.
-Something to mark your fabric with: a pencil or fabric marking pen.
-Round up some miscellaneous buttons, beads, pearls or any other
little trinkets to use as embellishments in the center of your yoyos.
-Glue gun if you have one
-alligator clips or headbands to glue the yoyo’s to. Or you can sew the button on.

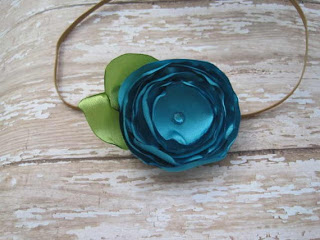
 Burnt Flower Clips
Flower tutorial by Emily Southerland
Flower Headband by PeekaBooBows
Miss Kate Flower Clip by SunshineandCarousels

Materials:
Synthetic fabrics like organza, taffeta, satin, dress lining, tulle, etc. (these burn the best...)
Matching thread
Glue gun/ tacky glue
Beads/pearls/buttons/other (for the centers)
Felt (enough to cover the back of your flowers)
Alligator Clips or other hair clips (My sister says "
I use double prong curl clips, or alligator clips. You can get them at any beauty supply store.")
Hand held lighter
Tweezers 


Toddler Bracelets 


Rose and Blue Bead Bracelet from LucyintheCity


Baby Girl Bracelets by TheFamilyJewels3
Materials:
-.7mm Stretch Magic bead - you can get this at Joann’s and I think Walmart has it as well. (read about this elastic cord here.)  Make sure to measure your little girl's hand to know how much to cut at the class.
-scissors 
-beads of your choice 
-jewelry design board (optional but helpful-just need something to keep your bead design from rolling around)
-glue 

Any questions, please let us know.  Please RSVP any old way to let us know if you will be coming to this class.  See you on March 8th!!

Foot Pedals in High Speed

Thank you to everyone who came to our February Sewing Class - skirts and baby blankets - and especially to our guest instructor Cheryl Bennett!  We once again had a packed house- 14 in all, with some ladies determined more than ever to finish their projects:-)  Love it!!!  Need those pictures of your completed skirts and blankets ladies.

Thank you as well to Marcie and Melanie for snapping some photos of the evening for me.  Enjoy!


Monday, February 7, 2011

February RSVP Giveaway: Life-saving Liquid Stitch


Yes, its that time again...The countdown to our next class...those last few days, hours to get all your fabric and notions purchased and then that fabric ready for class.

This month our RSVP Giveaway is one of my favorite products:
LIQUID STITCH

This stuff is amazing and life-saving if you've got to repair something and don't have the time or resources to do it "properly" or if you just don't want to use your machine.  It's MacGyver's companion or Lazy Susan's champion, whichever suits you:-)

This little bottle is great to have around.  Here's the little description of it:
No need for sewing when this permanent glue holds fabric in place-wash afterwash! Just the thing for easy, stitch-free crafting; great for hemming too. The liquid fabric adhesive dries clear for flawless results
So you know the drill:  call, email, comment on the blog, FB, text, yell across the neighborhood...
Wow there's a lot of ways to communicate, so pretty please choose one and let me know yay or nay on coming and if its a Yay!! please let me know which class.

Thanks so much and I would love love it if I could get some help with those needed things listed in the sidebar: lamps, extension cords, ironing boards, etc.

Saturday, February 5, 2011

Get those scissors ready: Cutting out for your High-Waisted Skirt


{Ok, so no laughing at my self-portraits.  Its tough to do!  And I wasn't about to hand over my camera to my 8 year old.}

I love my skirt.  I'd love it more if I were about 20 lbs lighter but for post-baby, I'm loving it.  {Don't you love my shoes too?  Mike bought them for me - such a sweet husband.}

I used my seam ripper a few more times than I would have liked in making this skirt, but its all for YOU.  My plan was to figure out how to make this skirt, mistakes expected, in order to help you try to avoid making too many of your own:-)

So you've got your fabric for the skirt... Now what?

Always Recommended: pre-wash, dry, and iron your fabric before cutting.  Launder the fabric as you would the finished project.

First of all: 
Take some measurements using your sewing tape measure:
Your natural waist {the indentation above your belly button but below your rib cage- you want it to be a fitted measurement}  We'll call it W

Desired Length of skirt {from where bottom of the approx 4" waistband will sit to wherever you want the length to be- better to be too long than short**}  We'll call it L

Next:
Decide how gathered you'd like your skirt.  Kelly's skirt shown in the post below is "moderately gathered".  I wanted mine to be super gathered.  This will determine the width of your skirt piece.
"Moderately gathered" = Approx 1 1/2 to 2 times your W
Super gathered = Approx 2 1/2 to 3 times your W  {Mine was about 3 times my W
***You will have to purchase more fabric the more gathered you want it, unless you're able to cut 2 skirt pieces from your fabric's width***


Sorry, you have to do some math...And remember when you sat in math class in junior high and thought it'd never be useful:-)


Width of Skirt Piece in Inches= {(1.5 to 3) x W} + 1 (for seam allowance)


Length of Skirt Piece in Inches = L + 2 {for seam allowances}


Now:
Cut your skirt piece using measurement results from above= Width of Skirt Piece in Inches x Length of Skirt Piece in Inches  (i.e.   61" x 22" for a 30" waist with a moderately gathered skirt)

**If you are unsure it is always better to cut a little more.  You can always trim later.**
*If you would like some tips on cutting, see our post HERE for some tips and video tutorial.*

Now look at the fabric that remains.  You will have to cut out 2 waistbands and 4 ties, so arrange before cutting!

Download
, print, and tape together notespattern1.pdf and notepattern2.pdf of Kelly's pattern piece HERE.  This is your waistband piece.  {I added a few inches to my pattern piece length because my waist is a little larger.}


****Add 1/2" seam allowance to outside of pattern piece on top, bottom, and side NOT marked 'fold'***


Kelly instructs "Once you have printed our the pattern, cut two from your fabric and 1 from the interfacing."  Remember to place the "fold" edge of pattern piece on the folded fabric or interfacing accordingly before cutting.

Last cutting step:
"To make the ties you will need 4 pieces the same width and length".  I wanted wide and long ties.  My ties measured 3" x 42".  Make sure to Cut 4.


You should have CUT:
1 skirt piece {or 2 skirt pieces if you'd like to buy less fabric and the fabric width is wide enough}.
2 waistbands from fabric
1 waistband from interfacing
4 ties


I pray that this all makes sense.  Please, please ask me questions if you have any before cutting.  I tried my best to make this easy for you and explain everything, but as you can see, its late and its very possible that I've jumbled my words.


Come to class with your fabric cut and your bobbins wound and machine threaded.  We've got to get busy, busy!


Please RSVP to let me know if you will be coming to this class.  Thanks ladies!!