Monday, June 11, 2012

Basic Quilt Piecing and Car Seat Quilt Class


hello everyone...
sorry to keep you guessing but i think you will agree that this class will be worth the wait!
this month i will be handing over the reins to a success story of our sewing group:
Marcie Harris
Marcie first took her sewing machine out of her box at one of our first classes and has since caught on fire with sewing, in particular quilting.  she was inspired from this blog Moda Bake Shop


and created her own car seat quilt {first photo shown} which is perfect for the beginner quilter.  she will be teaching a basic quilt piecing class while teaching you how to make this darling quilt

BASIC QUILT PIECING and 
CAR SEAT QUILT CLASS

THIS WED, JUN 13th from 7:30 to 9:30 pm
at Briana Johnson's Home


Here is the class introduction by Marcie:


Above is the link that inspired the Car Seat Lap Quilt. I just chose an easier pattern to piece and made it a little smaller.

We will have an intro to basic quilt piecing including how to cut, piece, & bind.


What you need
30 5 x 5 inch squares
3/4 yard for backing { I used minky}
3/4 yard of flannel {for a thinner quilt} or batting {for a warmer quilt}
yarn for tieing.
2 - 1-1/2" x 28 strips for ties
2-1/2" strips totaling 115" for binding


iron
ironing board
hand sewing needle
thread
rotary cutter and plastic guide ruler {if you have one, Marcie will be bringing hers}


Total quilt will be approx 24 x 28

I used 5 different prints and bought a 1/4 yard of each, which was more than enough. To bind the quilt buy a little extra of one of the prints. I didn't have enough so I am using two different fabrics for the binding. You will also use scraps for the ties. 

You MUST cut the 5 inch squares with a rotary cutter. Please let me know if you would like to come use mine!! In quilting we work with 1/4" seems so the cutting has to be precise.

***


Ideally if you could come with all of your pieces cut, that would make it possible for Marcie to teach all of the other essential quilting techniques during our class.  
I do know that some of you are absolutely intimidated by cutting, so try your best, but if you are just feeling overwhelmed or do not have access to a rotary cutter {and can not come over to her house earlier to use hers}, please come with your fabric and come learn the techniques.  


I am soooo excited for this class.  It is something that is new to me!  I always loving learning new techniques.  Please join us and give us a holler if you will be joining us.  

Super Cute Anthropolie Necklace


Come and make this Beautiful Anthropolie-inspired easy to make necklace. 

Here is what you need....


  • Fabric for necklace and ruffles – I used a sort of sheer fabric I had on hand 

  • Beads – 3 sizes. Buy the cheapies – they don’t show. The largest bead I used was 1/2″ diameter, then two smaller sizes. I got my beads at Michael's. 

  • Thread to match

  • Sewing machine

  • Safety pin


Cut your fabric into long pieces – measuring total of around 90″ long by 2″. Mine were 2 pieces that I sewed together in the middle. That’s no big deal, we’ll just hide the seam in a knot.
Cut out your circles – 2 1/2″ diameter. I used 22 but you would want to cut out a few more in case you want it a little rufflier.

Thats all you need to make it!!
Sew... come on over to Brianas home this wednesday,  June 13th at 7:30pm and you will leave looking fabulous with your new cute necklace. 
See you all there. 
~Heather 

Sunday, May 6, 2012

May Giveaway!!

This is a Beautiful handcrafted Anthropolie-inspired beaded necklace, that we are just giving away to you...

Well there is one little catch... 
All you have to do is just tell us your coming to sew with us on May 9th, 7:30-9:30pm @ Brianas home, at our monthly sewing class held by our Lovely and Talented ladies... Briana and Heather they are both teaching you
 some nifty skills

Briana is teaching...Buttonholes via Refashioned Cardigan
Heather is teaching...Maxi Dress and pleated skirt

So drop us a note, a call, a post, or even an email. Anything will do. And Don't forget to grab some Fabric.
Hope to see you all there!

Saturday, April 28, 2012

Skirts and dresses, Oh My!

Come and make one or both of these easy to make 
maxi dress and pleated skirt. 


Wednesday, May 9th from 7:30 - 9:30 pm
at Briana Johnson's home

*Before you purchase your fabric, Please measure your Body, that way you will know how much fabric to get. (These size tutorials are for the models in the pictures.) 
And pre-wash all fabric. 

Maxi Dress


Here's what you need~
Fabric: 2-3 yards (depending on your size)
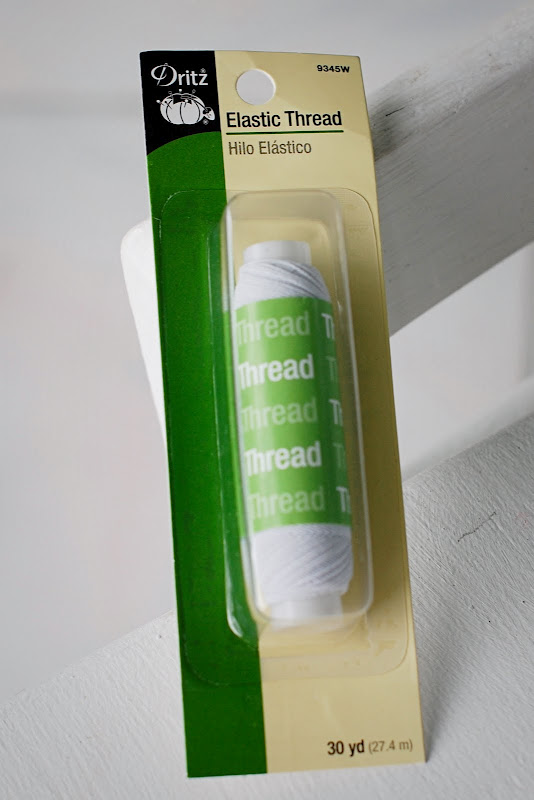
Thread: Elastic Thread
Sewing machine
Scissors 
Iron / ironing board 
pins


(The original tutorial called for 3 yards of fabric. I only used 2 yards with some left over when it was all said and done. The amount of fabric you need will depend on your sizing. You basically need to be able to wrap the fabric 1.5 times around your high waist.)


 First step is to cut your tank/T-shirt.  Final measurement was 15 3/4 inches from the top of one shoulder strap to my cut line. again...that measurement will depend on your sizing. Cut about where you want the skirt to attach...in my case, it was my high waist. Just leave a little room to sew the tank to the skirt.


 *Unfold your fabric and wrap it 1 and 1/2 times around your waist where you want the skirt part of the dress to start. Cut off the remaining fabric.  


*Now just bring your cut fabric and shirt to our class so we can sew it together for a fabulous dress!


Pleated Skirt


Here's what you need~
Fabric: 1 1/2 yards of a knit fabric, or something with a little stretch already in it.  36" x 50"
Thread:Elastic thread

Sewing machine
Scissors 
Iron / ironing board 
pins
Measuring tape

First,  Cut out 2 waistbands that measure 4"w x 36"l (I wanted a thicker waistband).  
Cut 2 sections for the skirt front and back.  Make the width of the skirt be about 2 times wider than your waist.  Mine measured 36"w x 20"l (adjust length accordingly)


Second,  I think the skirt looks better with a tiny bit of flare at the bottom.  Fold your front section in half, and cut a slight diagonal, so that the bottom is about 5" wider than the top.  Do the same thing for the back skirt piece.

*Now just bring your cut fabric to our class so we can sew it together for a fabulous Skirt!

Don't foget to reply so we can count you in for our giveaway!
Thank you....See you there.


Tuesday, April 24, 2012

May Class: Buttonholes via Refashioned Cardigan

I have received so many requests on how to do buttonholes that I felt like it was time to feed the masses.
Presenting one of our May Classes:

Buttonholes via Refashioned Cardigan
Wednesday, May 9th from 7:30 - 9:30 pm
at Briana Johnson's home

This will be a great class in which you will come home with a completed project having learned a new skill and having transformed something neglected in your closet to something refreshed.

Here's the plan:

Find a thicker knit shirt from the back of your closet {or on clearance at your favorite store}
*it can be whatever sleeve length, just remember it is going to become a cardigan

Purchase the following supplies:
*button{s} - you can have one large, or several smaller ones - really its up to you
*thread - matching or contrast, whatever you want - just remember contrasting thread will show:)
*iron on hem tape {find at Joann's or Wal-Mart}

Accompany those with these:
*a ruler or even better, a yard stick
*scissors
*seam ripper ;)
*light fusible interfacing {if you have some - if not we can share}
*dressmaker's chalk or disappearing fabric marker
*measuring tape
*straight pins 
*iron
*ironing board
*machine
*machine manual {important if you've never done a buttonhole on your machine - every machine is different}
*buttonhole foot {if your machine requires it - check out your manual - then look for it in your utility box}

We will be beginning with the diy tutorial from Easily Dunn rightfully named:


To which we will add the ever so intimating buttonhole.  Really, you are going to be impressed with how unintimidating it is:)

So on your way to the jungles of your closet to find that 6th grade shirt, you know the one.
Then head back over to RSVP to let us know that you and your shirt will be joining us!

Photos by Easily Dunn

Monday, April 9, 2012

Our April Giveaway!


This cute pin cushion jar will be our giveaway!
All you have to do is sign up for our class or let us know that your coming, this April 11th and come enjoy lots of fun sewing.

Looking forward to seeing you!

April Class: Skinny Me Up - a pants' story of transformation

Hi ladies!
Ready for this fun class??!!
Lets dig into the back of our closets
{or our children's}
and find those unflattering pants that are waiting for a makeover story of their own.

This month our class will be
Skinny Me Up
a pants' story of transformation
turning those baggy pants to fabulously fitted


we will be following Art with Ashley's Frumpy to Fabulous tutorial as featured in the above photo

THIS WEDNESDAY
April 11th, 7:30-9:30 pm
at Briana Johnson's Home

Here's what you should bring with you:
*pair of baggy pants that still fit around the waist
*pair of 'skinny' pants that fit well {this will serve as our pattern}
*two different colors of fabric marking pencils, markers or dressmaker's chalk {these will create our lines for our patterns - you want the kind that washes away or disappears - should be available at Wal-Mart or Joann's - we can always share if you don't want the expense}
*lots of straight pins
*measuring tape
*thread to match
*fold up cutting board {optional}
*basic sewing supplies - machine, manual, scissors

If you can bring any of these items for set-up that would be great!!
*folding table
*folding chair
*lamp
*extension cord

Make sure to RSVP to be entered into our darling Pin Cushion Jar!!
comment, email, call, text, FB, holler...
Just let us know you'll be headed our way:)

Hope to see you guys!

Blanket or Pillow? BOTH!


Blanket? Pillow? What is this called?
A Quillow!!!
A comfy and soft blanket that folds up into a pillow. And super easy to sew.


Want to make one?
Then come to our class this Wednesday April 11th @7pm.

This is what you need:
*Fabric: 45'' wide, 5 yards total
Color 1: (Top) 2 1/2 yards
Color 2: (Bottom) 2 1/2 yards
*Batting to equal your cut fabric size.
*Thread matching your fabric
* Sewing machine
*Scissors
*Etc.

For the pillow pocket:

* 19" fabric square in color 1 (top)

* 19" fabric square in color 2 (bottom)

* 19" square of batting.


For the quilt body cut as follows:


* 73" long piece of fabric from the 45" fabric (if your fabric is wider, cut it into a 45" width) in color 1 (top)

* 73" long piece of fabric in color 2 (bottom)

* piece of batting 73" x 45"


Please have your Fabric and Batting already cut.

If you get too confused you can cut it at the class. See you soon.


Please let me know if you would like to come and sew with me by posting.
There will be a giveaway to those who post. Thank you and see you all soon.